Introduction
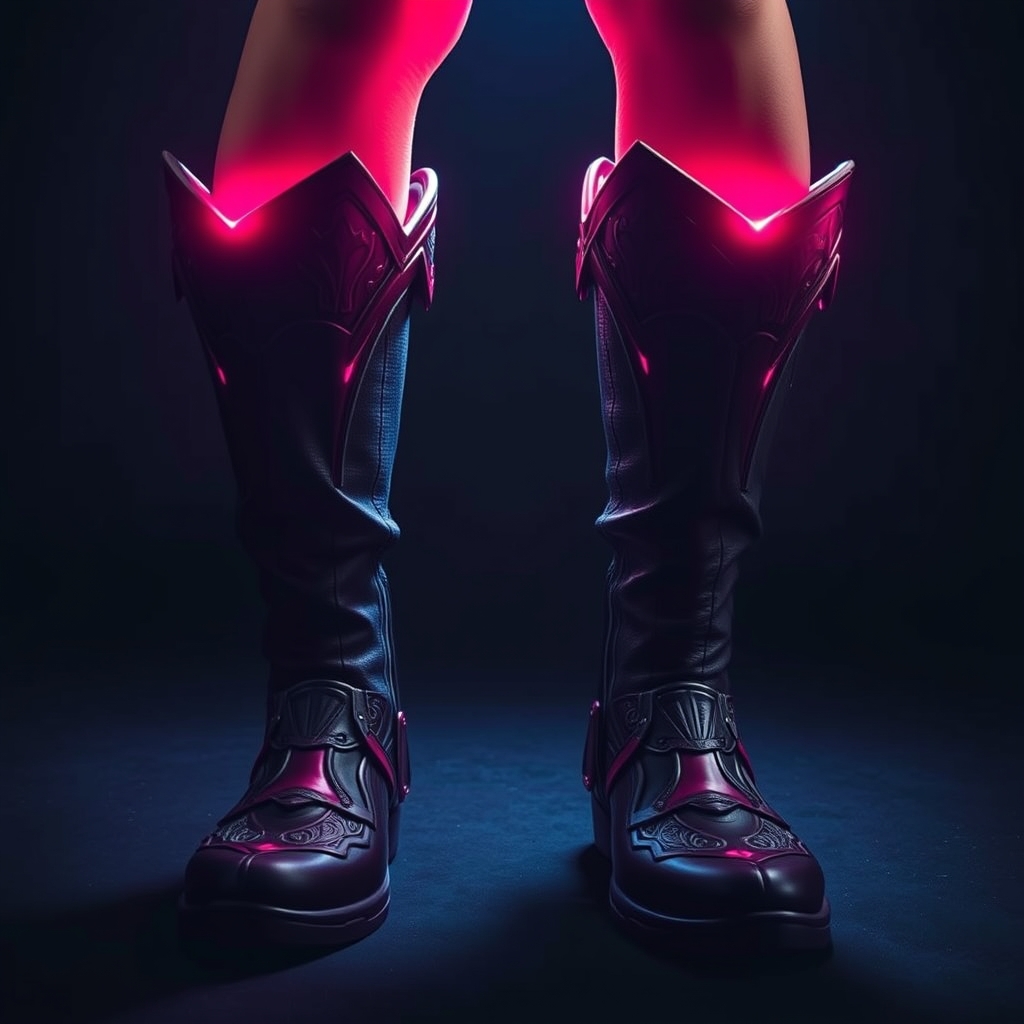
Diablo 4, the latest installment in the iconic action RPG series, has taken the gaming world by storm. As cosplayers and fans, we're excited to bring the game's dark fantasy universe to life through our craft. One of the most striking aspects of the game's character designs is the Sorcerer's attire, particularly their distinctive boots. In this guide, we'll walk you through the process of creating realistic Sorcerer boots, perfect for elevating your Diablo 4 cosplay.
Materials and Tools
Before we begin, make sure you have the following materials and tools:
- Foam ( Worbla, Wonderflex, or EVA foam)
- Leather or faux leather (for the boot's upper material)
- Adhesives (hot glue, epoxy, or contact cement)
- Paints and primers (acrylic or enamel)
- Weathering powders or pigments
- Sculpting tools (e.g., Dremel, X-Acto knife)
- Pattern making paper or cardboard
Design and Pattern Making
Study reference images of the Sorcerer boots from Diablo 4 to get a sense of their shape, proportions, and details. Create a rough sketch or pattern of the boot, breaking it down into individual components (e.g., toe, heel, cuff). Use paper or cardboard to create a mockup of each part, adjusting the proportions as needed.
Once you're satisfied with your pattern, transfer it to your foam material, using a marker or pencil to mark the cut lines.
Crafting the Boot
Cutting and Shaping the Foam
Cut out the individual foam components using your preferred tool (e.g., Dremel, X-Acto knife). Use a file or sandpaper to smooth out the edges and refine the shape.
Assemble the foam parts using adhesives, starting with the toe and heel sections. Make sure to align the parts carefully, as this will affect the overall shape of the boot.
Adding the Upper Material
Cut out the leather or faux leather material according to your pattern, leaving a small margin around the edges. Apply adhesive to the foam and attach the upper material, starting from the center and working your way outwards.
Use a combination of clamps, weights, or masking tape to secure the material in place while it dries.
Painting and Weathering
Priming and Painting
Prime the entire boot using a suitable primer, allowing it to dry completely. Then, apply acrylic or enamel paints to achieve the desired color and texture.
Use reference images to get a sense of the Sorcerer's color scheme and apply thin coats of paint, allowing each layer to dry before adding additional details.
Weathering and Aging
Use weathering powders or pigments to add depth and age to the boot. Apply these using a brush or a small tool, focusing on areas that would naturally accumulate dirt and wear (e.g., crevices, edges).
Seal the weathering with a clear coat to prevent flaking or smudging.
Finishing Touches
Add any final details, such as buckles, straps, or rivets, using a combination of materials (e.g., metal, leather, foam). Make sure these elements are securely attached to the boot.
Inspect your boot carefully, making any necessary adjustments or repairs before finishing.
Conclusion
With these steps, you've successfully created a pair of realistic Sorcerer boots from Diablo 4. Whether you're a seasoned cosplayer or prop maker, this guide should help you elevate your craft and bring the game's dark fantasy universe to life.
Share your creations with the cosplay community, and don't hesitate to reach out to fellow crafters for feedback and inspiration.