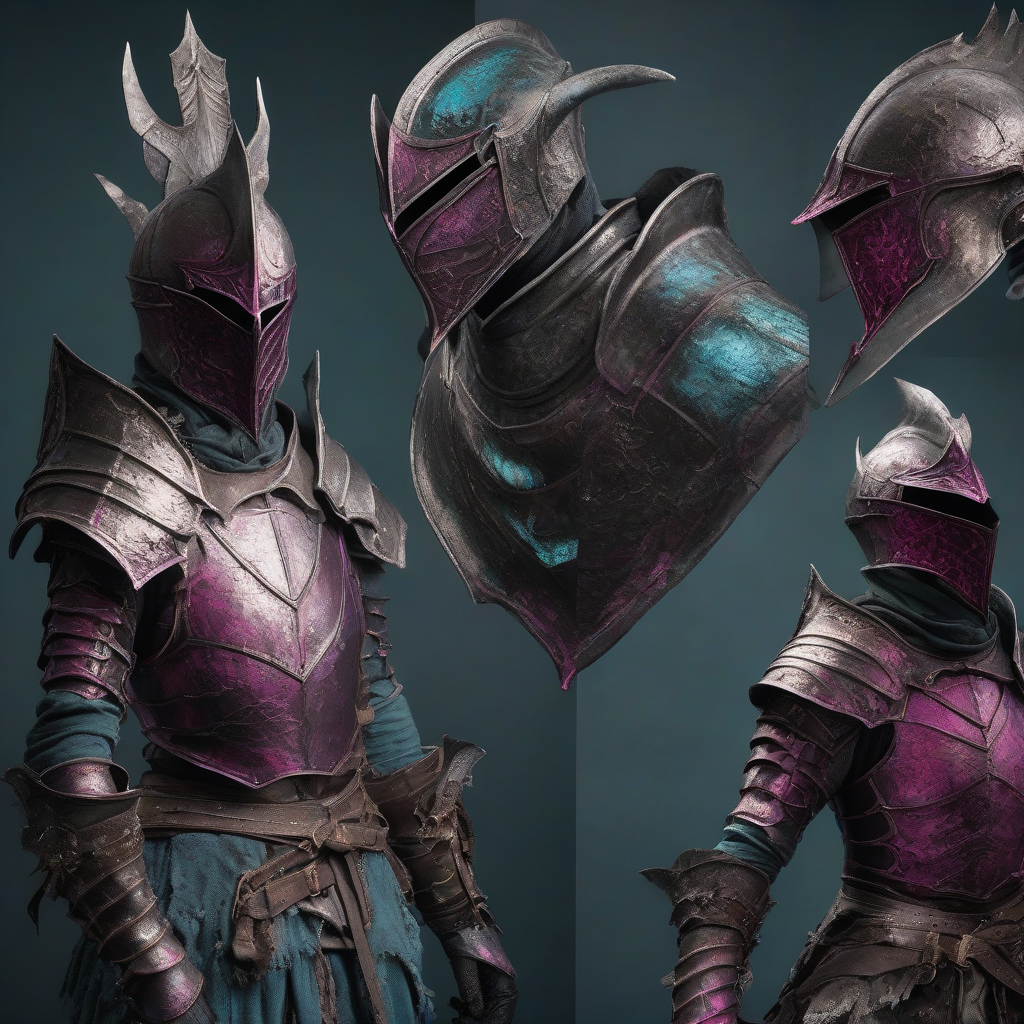
Introduction to Dragon Slayer Armor
The Dark Souls series has captivated gamers worldwide with its rich lore, atmospheric worlds, and intricate character designs. Among the many iconic armors in the game, the Dragon Slayer set stands out for its unique design and historical significance. As a cosplayer or prop maker, crafting a Dragon Slayer armor set can be a challenging yet rewarding project. In this guide, we'll walk you through the process of creating an accurate and visually stunning Dragon Slayer armor set.
Materials and Tools
To create a Dragon Slayer armor set, you'll need a variety of materials and tools. Here's a list of the essentials:
- Worbla or similar thermoplastic materials for the armor plates
- Foam or cardboard for pattern making and base structure
- Hot glue gun and epoxy for bonding
- Sandpaper and files for smoothing and shaping
- Paint and primer for finishing
- Safety equipment, including gloves, goggles, and a dust mask
Pattern Making and Design
Before you start crafting the armor pieces, you'll need to create a pattern or template. You can use paper or cardboard to create a rough outline of the armor pieces, or use 3D modeling software to create a more accurate and detailed design. The Dragon Slayer armor set consists of several pieces, including:
- Breastplate
- Gauntlets
- Greaves
- Helmet
Study reference images from the game to ensure accuracy and attention to detail. You can also use online resources, such as Dark Souls modding communities, to find detailed 3D models and textures of the armor set.
Crafting the Armor Plates
Once you have your pattern or design, you can start crafting the armor plates using Worbla or similar thermoplastic materials. Here's a step-by-step guide:
- Cut out the armor pieces from Worbla or thermoplastic material using a heat gun or craft knife.
- Shape and smooth the edges using sandpaper and files.
- Bond the pieces together using hot glue or epoxy.
- Apply a primer and paint to achieve the desired color and finish.
Adding Details and Weathering
To add an extra layer of realism to your Dragon Slayer armor set, you can add details such as:
- Engravings or etchings using a Dremel or similar tool
- Rust or wear effects using paint or weathering powders
- Leather or fabric straps for added texture and detail
Reference images from the game to ensure accuracy and attention to detail. You can also experiment with different techniques and materials to achieve a unique and weathered look.
Conclusion and Tips
Crafting a Dragon Slayer armor set requires patience, skill, and attention to detail. With this guide, you'll be well on your way to creating an iconic and visually stunning cosplay piece. Here are some final tips:
- Start with a solid plan and design before beginning the crafting process.
- Use reference images and online resources to ensure accuracy and attention to detail.
- Experiment with different materials and techniques to achieve a unique and weathered look.
- Practice safety when working with power tools and materials.
For more information on cosplay and prop making, visit BYO Cosplay for tutorials, guides, and community resources.