
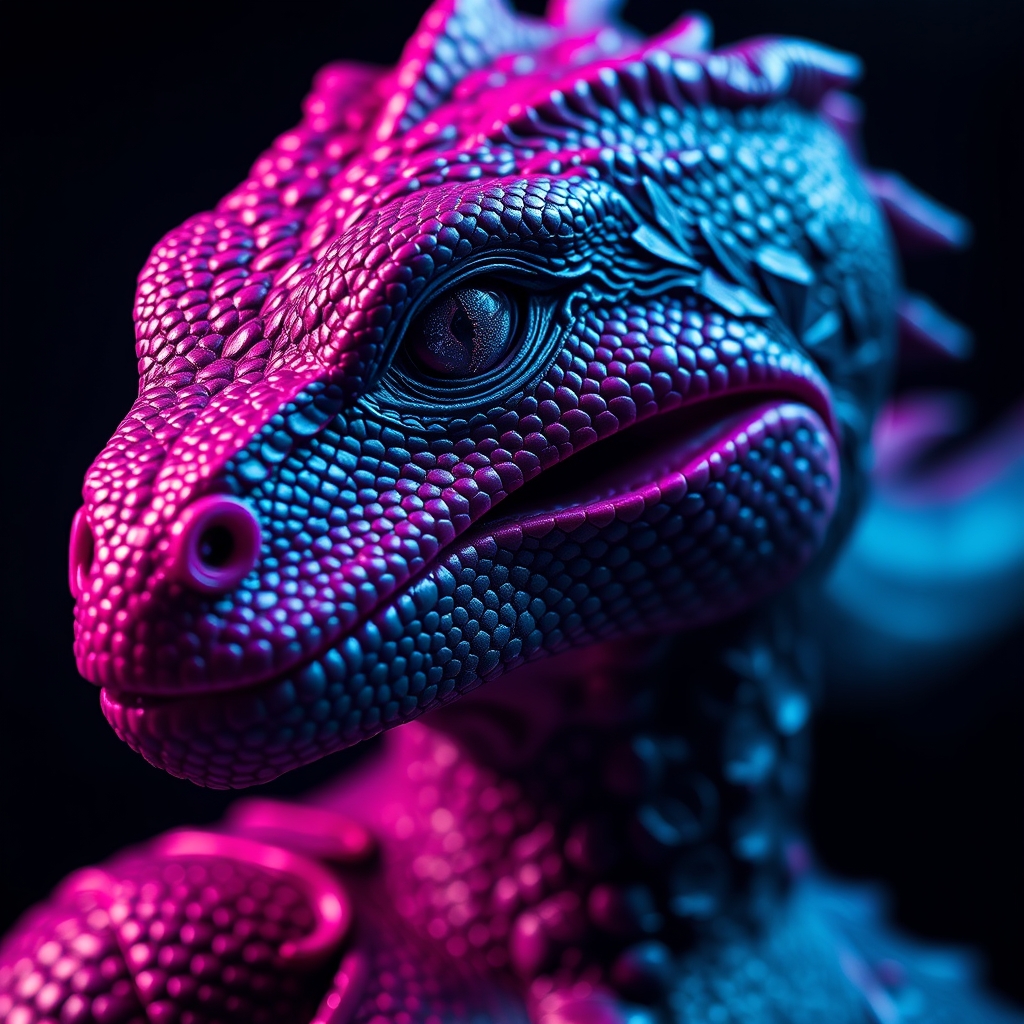
Introduction to Hyper-Realistic Cosplay Scales
Creating realistic reptilian scales for cosplay can be a daunting task, but with the right techniques and materials, it's achievable. In this guide, we'll walk you through the process of creating stunningly realistic scales using resin casting and 3D printing. Whether you're a seasoned cosplayer or just starting out, this tutorial will provide you with the knowledge and skills needed to take your cosplay to the next level.
Materials and Tools Needed
Before we dive into the tutorial, make sure you have the following materials and tools:
- Resin casting material (e.g., epoxy resin, polyurethane resin)
- 3D printer and filament (e.g., PLA, ABS)
- Scale model or prototype
- Mold making material (e.g., silicone, alginate)
- Paint and primer
- Airbrush or paintbrushes
- Sandpaper and files
Designing and 3D Printing Scale Models
The first step in creating realistic reptilian scales is to design and 3D print a scale model or prototype. You can use computer-aided design (CAD) software or 3D modeling programs like Blender to create a digital model of your scales. When designing your model, keep in mind the following:
- Scale shape and size: Research the type of reptile you're trying to replicate and take note of the scale shape and size.
- Scale pattern: Study the pattern of scales on the reptile, including the arrangement and texture.
- Level of detail: Decide how much detail you want to include in your model, such as texture, ridges, or imperfections.
Once you have your design, 3D print your scale model using a suitable filament material. You may need to adjust the print settings and scaling to achieve the desired level of detail.
Creating a Mold and Casting Resin Scales
With your 3D printed scale model, you can now create a mold and cast resin scales. Here's a step-by-step guide:
- Prepare your mold making material according to the manufacturer's instructions.
- Apply a release agent to the scale model to prevent the mold from sticking.
- Pour the mold making material over the scale model and allow it to set.
- Remove the mold from the scale model and prepare it for resin casting.
- Mix and pour the resin casting material into the mold, making sure to fill it to the top.
- Allow the resin to cure and harden, then remove it from the mold.
Finishing and Painting Resin Scales
Once you have your cast resin scales, it's time to finish and paint them. Here's how:
- Sand the scales to smooth out any rough edges or bumps.
- Prime the scales with a coat of primer to create a uniform base coat.
- Use an airbrush or paintbrushes to apply paint and texture to the scales, referencing images of the reptile for color and pattern accuracy.
- Seal the scales with a clear coat to protect the paint and give them a glossy finish.
Tips and Variations for Hyper-Realistic Scales
To take your cosplay scales to the next level, consider the following tips and variations:
- Add texture and imperfections: Use texture paste, gel medium, or sand to add imperfections and texture to your scales.
- Experiment with different materials: Try using different resin casting materials, such as epoxy or polyurethane, to achieve unique textures and effects.
- Mix and match techniques: Combine resin casting and 3D printing with other techniques, such as foam sculpting or Worbla thermoforming, to create complex and realistic scales.
For further inspiration and guidance, check out online communities and resources, such as Cosplay.com or Thingiverse.com, where you can find tutorials, templates, and examples of hyper-realistic cosplay scales.



